
how to clean camera sensor on dslr safely is mostly about doing fewer things, but doing them in the right order, with the right tools, and stopping early if something feels off.
If you shoot at f/8 to f/16 and suddenly notice little dark dots in skies or on white walls, that’s usually sensor dust showing up. The frustrating part is that it can look like your lens is “dirty,” so people wipe the front element and nothing changes.
This guide walks you through a practical, low-risk workflow: confirm it’s really sensor dust, start with the least invasive cleaning, and only move to wet cleaning when you have to. I’ll also flag the situations where it’s smarter to hand the job to a camera tech.

Before you touch anything: confirm it’s the sensor (not the lens)
Sensor dust has a tell: it shows up most clearly at smaller apertures and stays in the same place across different lenses. Here’s a quick check that saves a lot of pointless cleaning.
- Take a test shot: set Aperture Priority, f/16, ISO 100, and photograph a bright blank wall or the sky (slightly out of focus helps).
- Review at 100%: look for dark, soft-edged specks or small “comma” shapes.
- Swap lenses: if the spots stay in the same position, it’s very likely on the sensor or inside the body, not the lens.
According to Nikon, using the camera’s built-in “Image Dust Off” or sensor cleaning features can help reduce the need for manual cleaning in many situations, but it won’t remove sticky debris like oil.
What you need (and what to avoid)
You can clean a DSLR sensor safely with a short list of dedicated tools. The biggest risk comes from improvising: tissues, cotton swabs, or “whatever is nearby.”
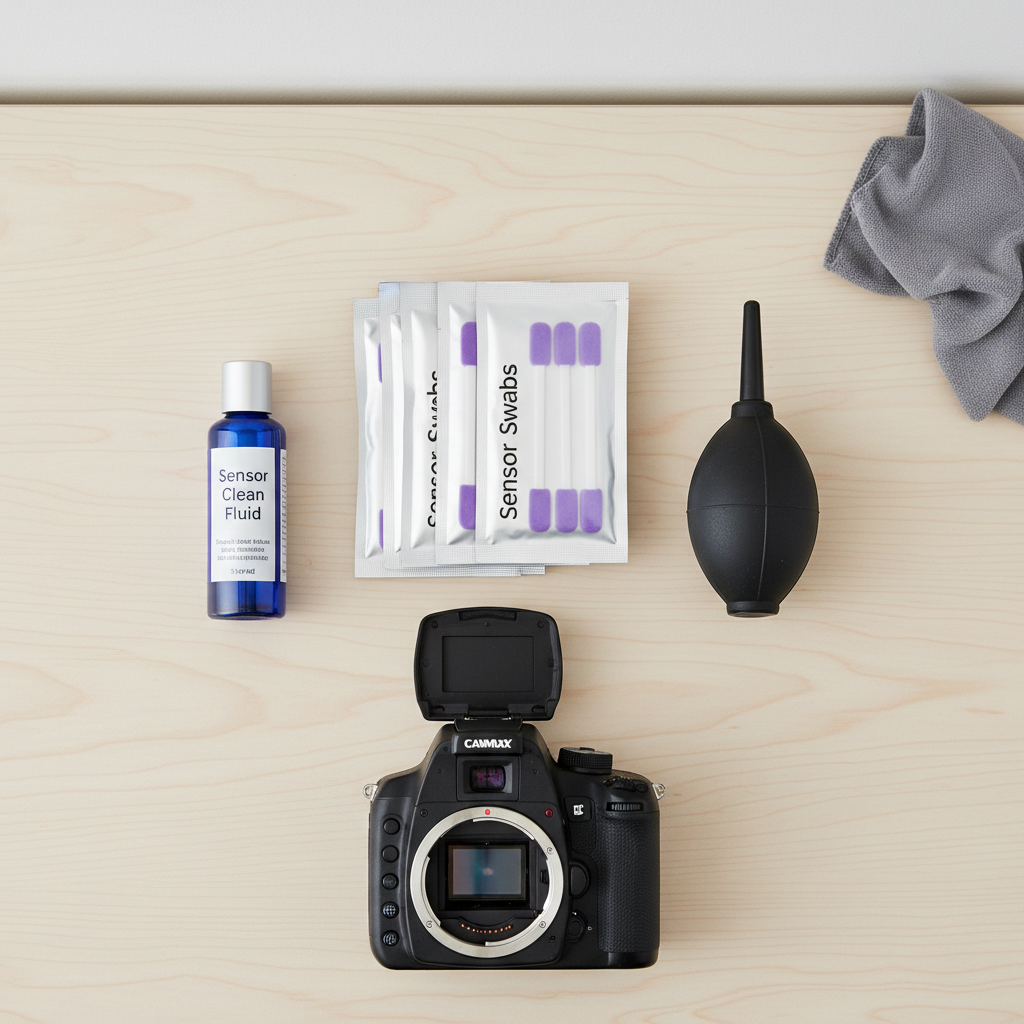
Recommended tools
- Fully charged battery (or AC adapter if your camera supports it)
- Hand-squeezed air blower (rocket blower style, no canned air)
- Sensor swabs sized for your sensor (full-frame vs APS-C)
- Sensor cleaning fluid made for coated sensors
- Bright light and, optionally, a sensor loupe for inspection
Avoid these common “shortcuts”
- Canned/compressed air (can spit propellant or blast debris harder than you expect)
- Household alcohol, lens wipes, paper towels (wrong solvents, fibers, coatings risk)
- Vacuum attachments (static and accidental contact risk)
Start with the lowest-risk method: built-in cleaning and blower
Most of the time, the safest approach is also the simplest. Try these steps before any wet cleaning.
Step 1: run the camera’s sensor cleaning function
Use the menu option for sensor cleaning (names vary by brand). Run it once or twice, then re-shoot your f/16 test image. It won’t fix everything, but it’s essentially “free” in terms of risk.
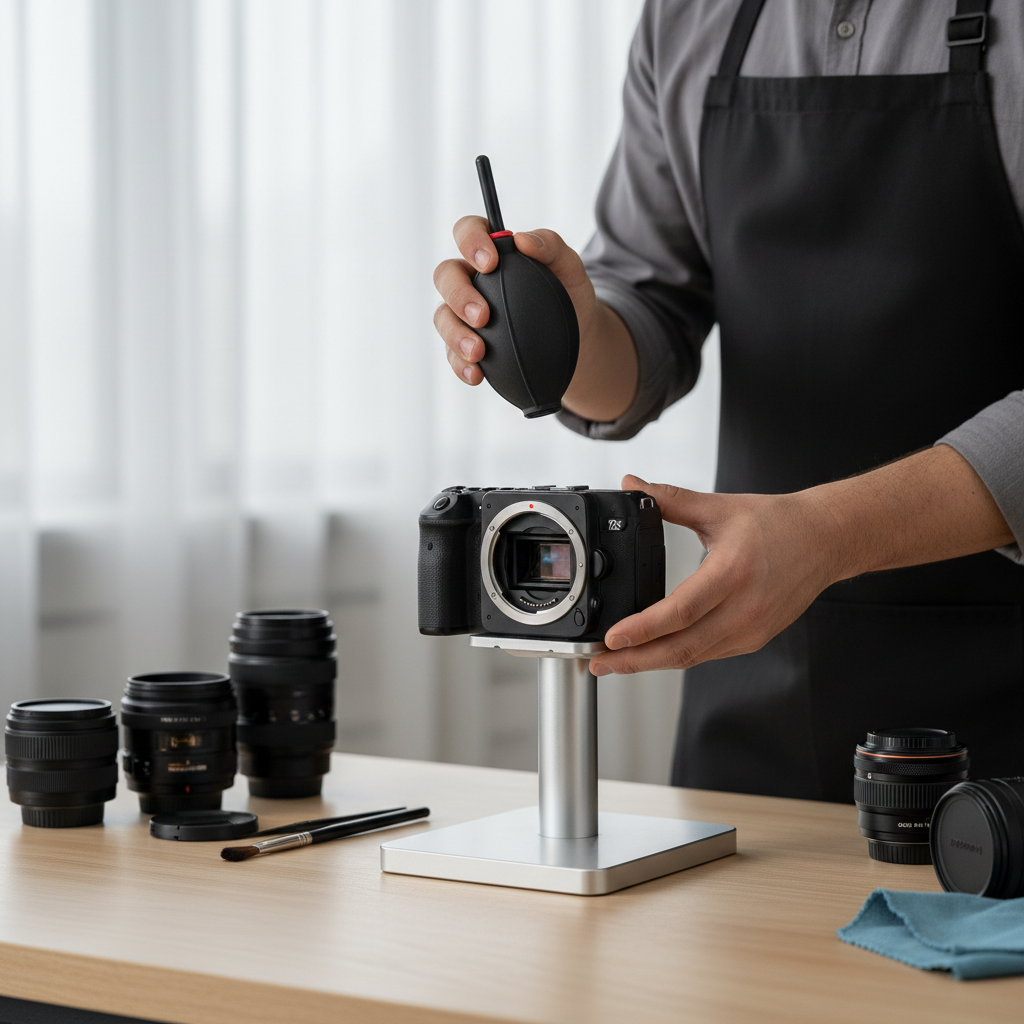
Step 2: dry blow out the chamber (carefully)
- Work in a calm, clean room, no fans, no open windows.
- Remove the lens, point the camera mount slightly downward.
- Use a hand blower to send a few controlled puffs into the mirror box area.
- If your DSLR has a manual sensor cleaning / mirror lock-up mode, follow the manual exactly.
Key point: never touch the sensor with the blower tip, and don’t “scrub” the chamber with anything dry.
When dry cleaning isn’t enough: wet swab cleaning (the careful way)
If your spots don’t move after blower cleaning, you may be dealing with stuck dust, moisture marks, or a light oil smear. This is where people get nervous, and honestly, that’s reasonable.
According to Canon, it’s important to use proper cleaning tools and follow the manufacturer’s instructions, because the sensor area includes delicate components and coatings.
Wet cleaning steps
- Charge your battery: if power fails mid-clean and the shutter/mirror closes, you can cause damage.
- Enter the camera’s cleaning/lock mode per your manual.
- Use the correct swab size: full-frame swabs for full-frame, APS-C swabs for APS-C.
- Add fluid sparingly: usually 1–2 drops on the swab (follow the fluid instructions). Too much fluid is where streaks come from.
- One pass, one direction: gently sweep across the sensor with even pressure.
- Flip to a clean side and sweep back once.
- Stop: don’t keep polishing. Take a test shot and reassess.
Real-world tip: if you see streaking after your first attempt, it often means too much fluid or a swab that picked up grime. Use a fresh swab; reusing “just one more time” tends to make it worse.
Decision table: which cleaning method fits your situation?
Use this to choose the least invasive step that still solves your problem.
| What you see in photos | Most likely cause | Try this first | Next step if it persists |
|---|---|---|---|
| Small dark spots, same location, stronger at f/16 | Loose dust | Built-in cleaning + hand blower | Wet swab cleaning |
| Smears or haze, looks “greasy” | Oil or sticky residue | Wet swab cleaning | Professional cleaning if it returns quickly |
| Random fibers that move around | Debris in mirror box | Blower with mount facing down | Service if debris keeps shedding |
| Spots disappear at wider apertures (f/2.8–f/5.6) | Minor dust, not affecting most work | Do nothing for now | Clean before critical shoots |
Safety checklist: a quick self-audit before you begin
- I have a fully charged battery (or approved AC adapter)
- I’m using sensor-specific swabs and fluid, not lens wipes
- I can follow my camera’s manual for mirror lock-up/cleaning mode
- My workspace is calm and clean (low dust, stable surface, good light)
- I’m okay stopping if the result is unclear after one attempt
If two or more items feel shaky, it’s a sign to slow down or consider a shop cleaning. That’s not being overly cautious, it’s just cheaper than a mistake.
Common mistakes that create scratches, streaks, or more dust
- Cleaning too often: if dust only shows at f/16 and you rarely shoot there, you might wait.
- Pressing hard with a swab: gentle, even contact works; force increases risk.
- Reusing swabs: one swab per pass cycle is the safer norm.
- Ignoring the rear lens cap and body cap: dirty caps can reintroduce dust immediately.
- Changing lenses in windy or dusty spots: you’ll feel like the sensor “never stays clean.”
Also, don’t confuse sensor dust with viewfinder dust. If you see specks only through the viewfinder but not in photos, that’s usually on the focusing screen or in the prism area, and sensor cleaning won’t change it.
When it’s smarter to get professional help
DIY is reasonable for routine dust, but a few scenarios are better handled by a camera store or manufacturer service center.
- You see repeating oil spots after multiple cleanings
- There’s heavy streaking that won’t clear with fresh swabs
- You suspect shutter damage or loose internal debris
- Your camera’s cleaning mode feels inconsistent, or the battery situation is uncertain
If you’re unsure, consider calling a local camera shop and asking what their cleaning includes and whether they inspect for residue. In many cases, that peace of mind is the whole point.
Practical wrap-up: keep it clean without making it a ritual
Knowing how to clean camera sensor on dslr safely comes down to restraint: confirm the problem, start with built-in cleaning and a blower, then move to wet swabs only when the dust clearly refuses to budge.
If you want an easy next step, shoot the quick f/16 test frame today and decide whether it even affects your work. If it does, gather proper swabs and fluid, plan ten calm minutes, and stop after one careful attempt to re-check results.
Key takeaways
- Test first so you don’t clean the wrong thing.
- Dry methods first, wet cleaning only when needed.
- Right tools matter more than technique tweaks.
- Stop early if you’re seeing streaks or uncertainty.
FAQ
How often should I clean my DSLR sensor?
It depends on how and where you shoot. If you swap lenses outdoors a lot, you might clean more often. If dust only appears at very small apertures, many people wait until it affects real jobs.
Is it safe to use canned air on a camera sensor?
Usually it’s not recommended. Canned air can blow liquid propellant or push debris with more force than expected, which raises the chance of residue or damage.
What if I cleaned the sensor and now I see streaks?
Streaks often come from too much fluid or a swab that picked up grime. Let the sensor area sit briefly, then try again with a fresh swab and minimal fluid. If streaks keep returning, a shop cleaning may be the calmer option.
Do I need a sensor loupe to clean safely?
Not strictly, but it helps you avoid over-cleaning because you can see what changed. If you don’t have one, the f/16 test photo is still a reliable way to judge progress.
Why do spots show up at f/16 but not at f/2.8?
At smaller apertures, the depth of field and light path make dust shadows sharper and more visible. At wider apertures, the same dust tends to blur out and becomes harder to notice.
Can sensor cleaning damage my camera’s sensor?
It can if you use the wrong tools, apply too much pressure, or lose power during a lock-up mode. With proper swabs, proper fluid, and a careful touch, the risk is typically lower, but it’s not zero.
Is the dust I see in the viewfinder the same as sensor dust?
Often it’s different. Viewfinder dust usually won’t appear in photos, while sensor dust will. If your images look clean, you may not need sensor cleaning at all.
If you want a simpler path
If you’re trying to keep shoots stress-free or you’d rather not do wet cleaning yourself, a local camera shop cleaning can be a practical middle ground, especially when spots look oily or keep coming back after you’ve followed the basic safe steps.